Wednesday, March 19, 2025

Easter Bunnies


Just look at those fuzzy faces! Made in minutes using a faux fur pompom, scraps of fleece, a wooden ball and a white pompom for a tail.


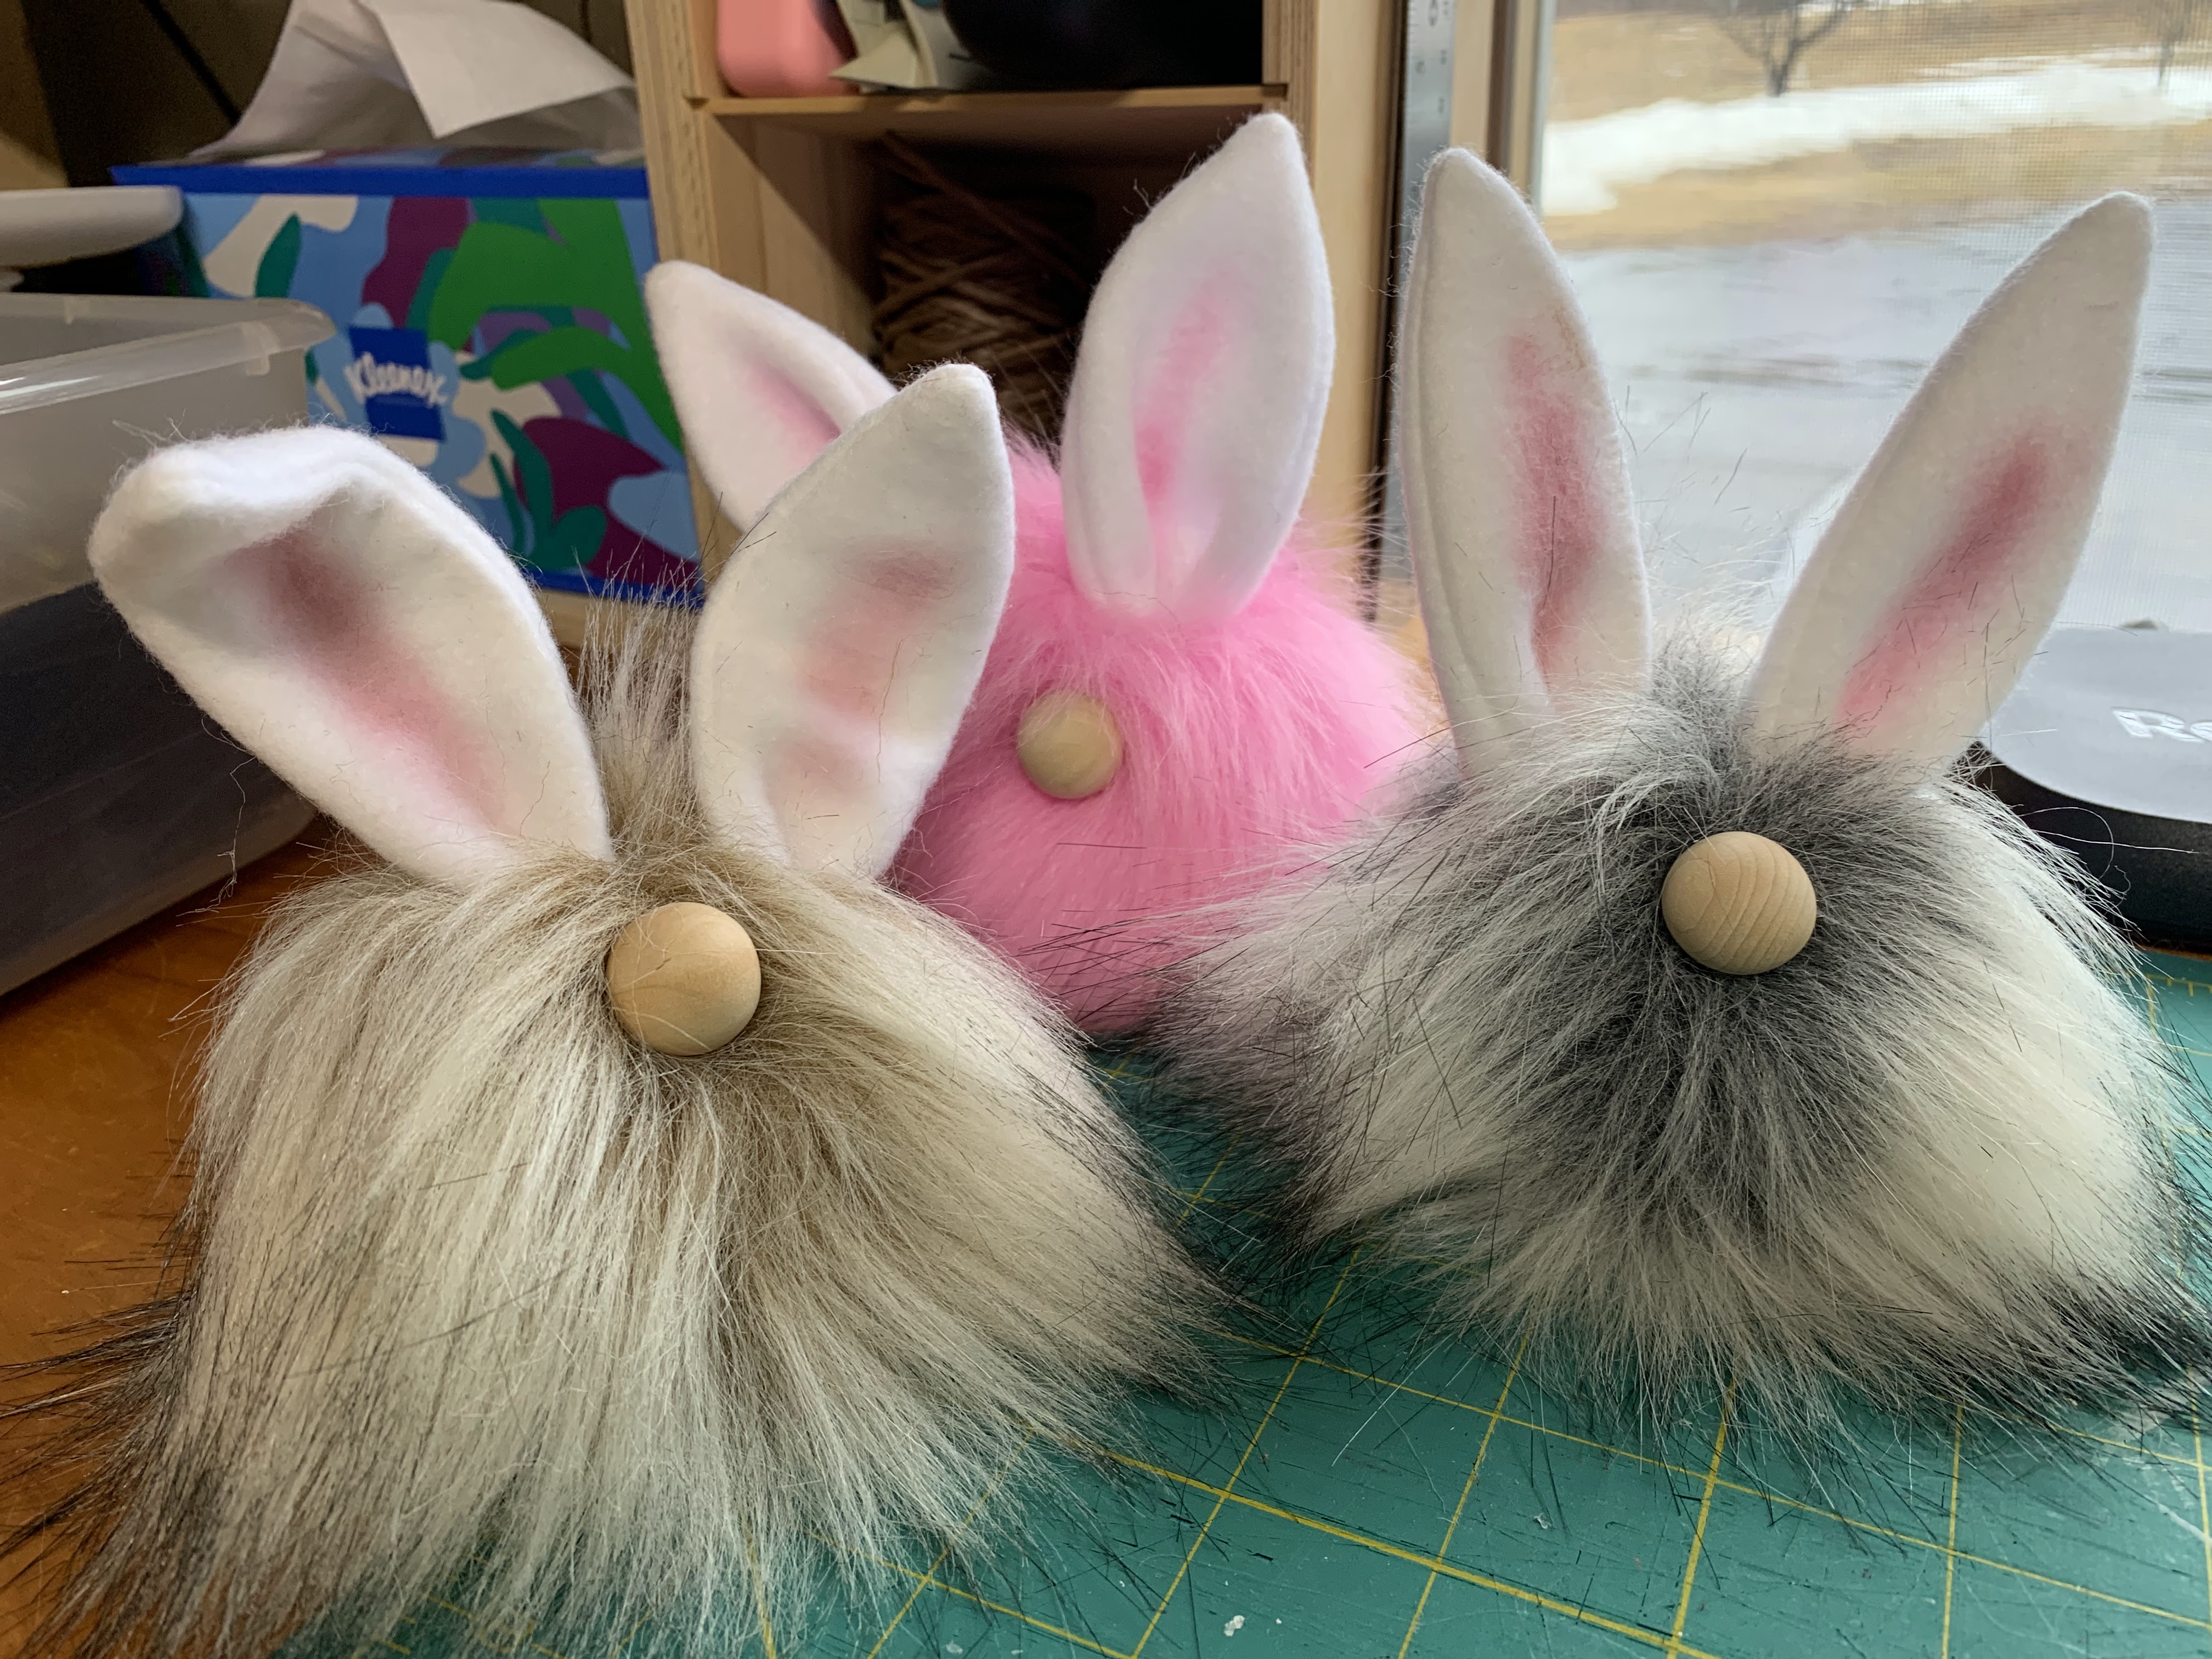
The first thing I did was to comb out the fur, which made an obvious place to glue on a white pompom for a tail.


Then I made ears from scraps of white fleece and colored the centers using makeup I bought at the Dollar Store!


And of course, the ears need to bend, so I dug out some white pipe cleaners (are they still called that?) and slid them inside.


Getting the ears in place was a little tricky because I had to cut holes at the top of the pompom, dig out a little stuffing, then glue the ears into the hole.


But if you're not careful, you can cut across the seam that holds the pompom together, and it will fall apart!  Oopsie!


The final step is to add the wooden nose to the face, and make the bunny come alive!


The pompoms can be a little hard to find, and when you do, they can be expensive. Recently, I found some at Michael's that were over $5.00 each, too much for me! But then went to Hobby Lobby and found them for $1.99! So of course I bought all they had in stock.

I took a basket full of these to a craft show years ago, and they were great sellers. I bet these will be too!

Tuesday, March 11, 2025

Tuesday Craft Day


Lucy found the perfect place to supervise her humans today!


I gave up on the idea of a full size afghan and decided to make a smaller one with the squares in the center. I will finish it by crocheting a border around it later.


Wow! Nancy's afghan is stunning!


And as usual, Lucy was a big help!

Thursday, March 6, 2025

Maine Signs


I like to have a variety of things to sell at my craft shows, and have found that stenciled signs, especially anything with Maine on them like these, are great sellers.


I usually use wood scraps I find in our workshop, but I came across these pallet planks at Walmart that work perfectly.

I prefer the whitewashed pallet plank,


but have made a few signs using the darker Barnwood Pallet Plank.


The LOVE sign is a single, horizontal stencil, which made it quick and easy to do.


But I couldn't stop at that and combined a square stencil with the LOVE stencil to make the HOME sign.

Notice the silicone mat under the plank. I use that for a lot of projects I don't want to slip or move when I'm working on them.

I usually use painter's tape to keep the edges of the stencil secure while I work. But of course I couldn't find it, so I dug into my desk and found sticky notes! 

I have several other stencils I want to make signs with, so check back often!


Tuesday, March 4, 2025

Tuesday Craft Day


I dug out my yarn for today's Tuesday craft day and joined two other crocheters, one knitter and one embroiderer for a fun day of crafting.

I started this African flower granny square afghan months ago, and don't expect to finish it anytime soon! But it's fun to have something like this to grab and go for days like this.


It didn't take long for little Miss Lucy to find my bag of yarn, do her balancing trick along the top of the chair and try to drop her fuzzy purple mouse inside.


From there she thought she should investigate a little closer and hopped down to inspect my stitches.


We had another successful crafting day, filled with live entertainment, good food, and great friendship.


Saturday, March 1, 2025

Plant stand re-do

Ever have one of those "aha!" moments when things unexpectedly come together? I had one of those this morning when I was trying to balance a cup of coffee, my cell phone and a book in my lap. 

I realized I needed a solid place to put all my things when I am allowed by the dog to lay on HER couch to catch up on reading, messages, or take a little nap in the sun.

So I took this ordinary plant stand that lives on the porch in the summer, 


and made it into this.....


simply by using two pieces of chipboard I saved from packages of Stampin' UP! Designer Series paper, and a roll of contact paper I recently bought to line my kitchen shelves with. (This project was much more fun than lining shelves).

When I retired as a Stampin' Up! demonstrator I sold, gave away and stored ALOT of my SU products. But one thing I made sure I kept was this awesome paper cutter. I can't cut a straight line with scissors, so this will always be close by.

I simply measured the openings in the stand, cut the chipboard to size, cut a piece of contact paper a bit larger than that, wrapped the paper around it, placed the squares into the openings, and done!


Piper's not too sure about it, but I think it's great!


Thursday, February 27, 2025

WOOL DRIER BALL HEADS


If you've got some wool drier balls hanging around and you don't want to use them to dry your clothes, make them into snowmen heads!


First thing I do is color their cheeks with a little make-up, then poke a hole between their cheeks for a nose.


Next, using either embroidery thread or crochet cotton, I sew their faces on and glue on their noses and eyes.


Finally, I make a hat from a sock or other fabric I have hanging around, glue that on their heads and add a jute hanger.


Just look at those happy faces! I think these will be great sellers at my Christmas crafts shows. 

Tuesday, February 25, 2025

Tuesday Craft Day

 Every Tuesday I get together with a group of friends and craft. All day! We start in the morning with coffee and a morning snack, craft until noon, take a break for lunch, and continue working on our project into the late afternoon.

Each of us does our own thing. This week we had two crocheters, one knitter, one embroiderer, and I sewed faces onto snowmen. But the main event every week is Lucy!

Lucy is a sweet, curious, mischevious kitten who rules the house. If she's not getting tangled in yarn or hiding in the plants, she's climbing on top of the cabinets so she can plan her next attack better. 


This week I finished a group of snowmen who needed their faces stitched and glued onto their heads.

These little guys are fun to make, and are a great way to use up your scraps.

I used off white felt for their bodies, orange felt for their noses and pieces of felt and fleece for their hats.

Their rosy cheeks are colored with actual powdered make-up, their eyes are half round black beads, and I use three strands of embroidery floss for their smiles.

They are weighted with about 1/4 cup of plastic pellets or kitty litter, then stuffed with fiberfil.


Looks like I need to make one more nose to complete this batch. And I think I will sew little jingle bells to the ends of their hats.

I make a lot of my snowmen and gnome patterns myself, but purchased this pattern on-line at QBPN.

Check back next Tuesday to see another photo of Lucy and to see what I made.